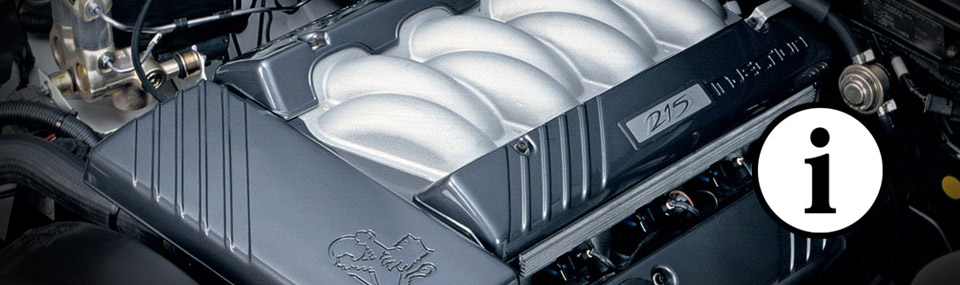

Holden memcals are programmed from the factory with very specific configurations. They are programmed for parameters such as: engine size, intake size, exhaust flow rate, fuel injector size and type, sensor configuration, transmission controls, dashboard data and everything that the computer controls to make it all run correctly together. Each memcal matches it’s ECU counterpart with a 4 letter designation (eg. CJKM).
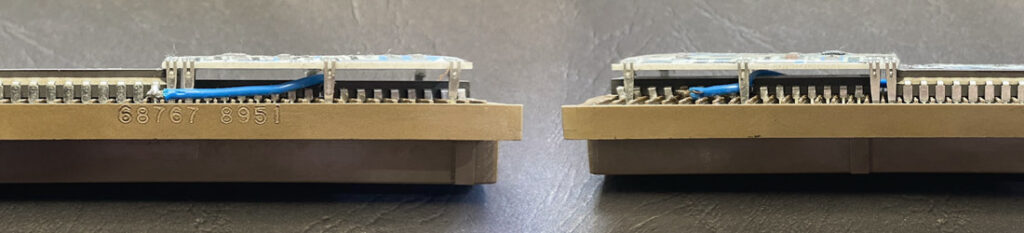
We have seen many ‘eBay’ type units sold as performance chips but when read, they only have a stock Holden file.
Look out for bridge links soldered between the EEPROM and knock board, this usually indicates a V6 memcal being used as a HSV unit. This “hack” will allow the injectors to function as per the V8 memcal however the knock boards are not like for like. It may work partially but not correctly.
+5V Supply – C
MAP Signal – B
Sensor Ground – A
5Volts – Pin B7 (Alternatively pin A7 from TPS)
Signal – Pin B10 (Add)
Sensor GND – Pin F16 (Alternatively pin E16 from TPS)
5Volts – Pin B7 (EGR (D) Violet/White)
Signal – Pin B10 (EGR (C) Light Green)
Sensor GND – Pin F16 (EGR (B) Black)
Leave EGR 5pin plug disconnected
5Volts – Pin C16 (EGR (D) Violet/White)
Signal – Pin C8 (EGR (C) Light Green)
Sensor GND – Pin D6 EGR (B) Black)
Leave EGR 5pin plug disconnected
5Volts – Pin B7 (EGR (D) Violet/White) (alternative pinA7)
Signal – Pin B10 (EGR (C) Light Green)
Sensor GND – Pin F16 (EGR (B) Black) (alternative pinE16)
5Volts – Pin C16 (EGR (D) Violet/White)
Signal – Pin C8 (EGR (C) Light Green)
Sensor GND – Pin B5 (EGR (B) Black)
Leave EGR 5pin plug disconnected
5Volts – Pin B7 (EGR (D) Violet/White) (alternative pinA7)
Signal – Pin B10 (EGR (C) Light Green)
Sensor GND – Pin F16 (EGR (B) Black) (alternative pinE16)
5Volts – Pin B7
Signal – Pin B10
Sensor GND – Pin F16
5Volts – Pin B7
Signal – Pin B10
Sensor GND – Pin F16
DEFINITIONS
A. Locasia Pty. Ltd. A.B.N. 44 060 809 903 trading as ChipTorque, its agents and its servants, is described hereafter as ChipTorque.
B. Owner includes the owner’s nominated agent, customer or corporation.
C. Testing includes repair, tuning, fitting, development and the supply of parts and equipment.
ChipTorque accept that the owner warrants that any engine and / or vehicle accepted for testing is in a suitable condition for any loads, speeds or temperatures that
would be imposed, or may arise, during such testing which includes testing using our chassis dynamometer etc. and that all parts used in the engine and the vehicle
construction are suitable for any severe duty that will be imposed on the engine or vehicle during testing. Such testing normally imposes loads greatly exceeding
manufacturer’s specifications.
Subject to compliance with the Workplace Health & Safety Act, the owner or their nominated agent is requested to either view and control such testing, or supply written instructions detailing any conditions or restrictions they may wish it be imposed during such testing. If no instructions are given the owner / agent agrees
expressly by implications default that ChipTorque will carry out any testing at their sole discretion.
ChipTorque will not be responsible for any damage, no matter how arising, which may occur during testing / repair or fitting of components to the engine, vehicle or electronics or any direct or consequential cost or costs as a result of such testing, repair or fitting. In the case of Supplementary Restraint Systems, ChipTorque is not
responsible for any associated costs for accidental deployment of the apparatus howsoever caused. Goods presented for repair may be replaced by refurbished goods of the same type rather than being repaired. Refurbished parts may be used to repair the goods. Goods containing user-generated or learned data may result in loss of data during the course of the repair.
ChipTorque does not carry any insurance covering any customer property, engines, vehicles or parts for any risks at all. ChipTorque therefore are
under no duty or responsibility of any sort whatever and whenever in contract or in tort or otherwise for any loss including theft, burglary, damage, harm, or reduction in value which happens to the customer’s property however that occurs.
ChipTorque reserve the right to withhold the customer’s property until payment in full for work carried out and parts supplied has been made. Where delayed collection of the vehicle or delayed delivery of customer supplied parts for job progression occurs, a vehicle storage fee of $25.00 per calendar day is charged. EFI diagnosis is chargeable at $250.00 for the first hour and at a minimum of $200.00 per hour thereafter. All other on site testing, including waiting time and travelling time, is chargeable at a minimum of $200.00 per hour. All custom programming and/or 2WD dyno work is chargeable at a minimum of $300.00 per hour. All custom programming and/or 4WD dyno work is chargeable at a minimum of $350.00 per hour. A cleaning fee of $200 may be charged if substantial fluids or debris from the vehicle contaminates the dyno or workshop area.
We accept goods for inspection, custody, storage, repair or other treatment subject to the provisions of “The Disposal of Uncollected Goods Act 1967 – 1973”. Conditions of this act allow for disposal of uncollected goods and vehicles under certain circumstances after not less than 6months.
Nothing in these terms and exclusions of liability and the accompanying terms and conditions of supply is intended to exclude, restrict or modify rights which you may have under the Competition and Consumer Act 2010 (Cth) or any other legislation which may not be excluded, restricted or modified by agreement, subject only that they are the sole basis on which ChipTorque are willing to take on work or other responsibilities.
To the extent permitted by law, the owner / agent releases ChipTorque and its employees and agents from any and all liability. The governing law of the contract between Locasia Pty Ltd and you, the customer, is the law of Queensland.
The following conditions shall apply to and form part of any contact for the supply of goods or services by LOCASIA PTY. LTD. (ACN 060 809 903) trading as or in the style of “ChipTorque” (herein after referred to as “the Company” to the Customer) including any contract arising from any orders received from the Customer for goods or services of the same or similar type to those goods or services to which this contract applies.
No quotation for the supply of goods or services given by the Company will constitute an offer capable of acceptance by the Customer. Any order placed by a Customer pursuant to any quotation given by the Company is not binding on the Company unless and until accepted in writing by the Company.
The price charged for the supply of goods and services shall be the price effective on the date of delivery, unless specifically quoted in writing by the Company as a fixed price for a specific period or otherwise agreed in writing, notwithstanding that delivery may be delayed by agreement of otherwise. Unless otherwise stated in writing by the Company the price shall be exclusive of sales tax, handling charges and delivery charges. The Company reserves the right to charge the Customer for any additional costs which the Company may incur on behalf of or at the request of the Customer. The Company reserves the right to charge a storage fee for any goods which the Customer fails to collect.
The Company reserves the right to improve or vary the goods and thereby change the specifications of the goods without notice to the Customer and without incurring any liability to the Customer.
a) Delivery to the Customer shall be deemed to be effective when the goods are delivered to the Customer or fixed to the Customer’s vehicle at the Company’s place of business.
b)All goods shall be at the Customer’s risk immediately upon delivery to the Customer or into the Customer’s custody (whichever is the sooner). The Customer shall insure the goods against loss or damage at its own expense.
c) The Company shall not be liable for any loss or damage (including consequential loss or damage) arising from delay in delivery of goods ordered or failure to deliver or supply any goods as a result of any cause or contingency whatsoever and the Customer shall accept and pay for the goods notwithstanding the delay or late delivery.
d) The Company will not accept responsibility for any short delivery or discrepancy in the quantity of goods delivered unless notification of same is received from the Customer (confirmed in writing) within seven (7) working days after the date of delivery and be supported by sworn affidavit or statutory declaration.
e) The liability of the Company with respect to proven short deliveries is limited to the replacement of the missing goods only and always subject to clause 4(c) hereof.
f) Deliveries to third parties may be arranged at the request of the Customer but always subject to acceptance by the Company. Goods delivered to third parties pursuant to this sub-clause shall be deemed to be delivered to the Customer and always subject to these terms and conditions of supply.
a) Property in the goods shall not pass to the Customer until payment by the Customer of all monies owing by the Customer to the Company in relation to supply of the goods. Until such time as the goods are paid to the Customer shall hold the goods as the bailee of the Company only.
b) Where property in the goods has not passed to the Customer, the Company has the right to enter the premises of the Customer and retake possession of the goods and to resell the goods notwithstanding the occurrence of any of the following events:- (I) a receiver or a receiver manager, an official manager of the Customer is appointed; winding up proceedings are commenced against the Customer; the Customer becomes bankrupt.
c) Until the goods are sold by the Customer, the Customer shall store the goods separately from its own and in such manner as to demonstrate clearly that they are and remain the property of the Company.
d) Where property in the goods has not passed to the Customer, the Customer shall account to the Company in respect of goods which are on sold by the Customer as soon as the proceeds of sale are received by the Customer.
a) Goods sold by the Company are covered by the manufacturer’s warranty (if applicable); in the event of there being no manufacturer’s warranty the Company warrants to the Customer that it will repair or replace at its sole and absolute discretion goods sold by the Company free of charge where those goods have been returned to the Company by the Customer, and which goods are acknowledged by the Company to be defective in material or workmanship.
b) The said warranty does not apply upon the occurrence of any of the following events: six months has lapsed from the date of delivery; the goods have been previously repaired or altered by any person other than the Company; the goods have been treated to abuse or neglect; the Customer is in breach of these Conditions of Supply.
c) The warranties contained herein are given in lieu of all other conditions warranties and undertakings express or implied which might otherwise be binding on the Company all of which are to the extent permitted by law expressly excluded and no further responsibility for any consequential damage or any other expense incurred by the Customer will be accepted by the Company.
The Company’s liability for breach of conditions of warranty implied by the Trade Practices Act 1974 shall be limited to one or more of the following, the choice being at the Company’s sole and absolute discretion; the replacement or the supply of equivalent goods OR repair of the goods OR payment of the cost of repairing the goods OR of acquiring equivalent goods OR payment of the cost of having the goods repaired, to the supply of services again OR payment of having the services supplied again.
a) Unless otherwise agreed in writing all goods will be supplied on a Cash On Delivery
b) The Company may in its sole discretion offer and withdraw credit (with or without reason). Where credit is extended to a Customer the Customer shall pay the outstanding amount to the Company without deduction within fourteen (14) days from the date which the goods were delivered. Where credit is withdrawn, all monies owing become payable forthwith.
c) The Company reserves the right to charge interest on any overdue account (monies not paid within thirty (30) days of the date of delivery of the goods or any monies which become payable as a result of a dishonoured cheque) at the rate of 3% per calendar month or $10.00 whichever is the greater.
d) The Company reserves the right to obtain a guarantee and indemnity from any party to whom it offers credit.
e) The Customer agrees and consents to the Company using the services of a credit agency from time to time to obtain information concerning the customer (and where applicable its directors and guarantors) in order to assess the Customer’s credit worthiness.
f) The Customer will be liable for all reasonable costs incurred in the recovery of any overdue account, including but not limited to solicitors fees as paid, process servers fees, collection agency fees and the like.
g) Where the Customer fails to make payment on the due date for any goods or services supplied by the Company or being a natural person becomes bankrupt or being a corporation by any act or omission enables the appointment of a scheme manager or trustee official manager, receiver, or receiver and manager, or liquidator, the Company may without prejudice to any other rights it may have retain a lien on any goods or vehicles of the Customer held by the Company.
No goods will be accepted by the Company for credit unless prior arrangements have been made. No goods will be accepted by the Company for credit if the said goods were made to special order and no credit will be given or allowed.
If the Company is to install or modify or otherwise interfere with goods and the Customer’s vehicle or vehicles then the Customer warrants that the vehicle and/or vehicles are mechanically sound and are suitable for chassis dynamometer testing and the customer irrevocably requests the Company to stringently test its goods whilst fitted in the customer(s) vehicle(s) and hereby releases and forever discharges the Company, its servants, agents and delegates from all actions, claims, suits and demands whatsoever which may arise either directly or indirectly from such testing.
The Customer will insure at its own expense all vehicles delivered to the Company for whatever the purpose and forever releases and discharges the Company, its directors, servants and agents against all actions, suits, claims and demands howsoever arisen in relation to the vehicles storage and/or parking at the Company’s premises.
These conditions of supply shall be governed by and construed in accordance with the law of Queensland and the parties agree to submit to the jurisdiction of the Courts of Queensland at Brisbane.
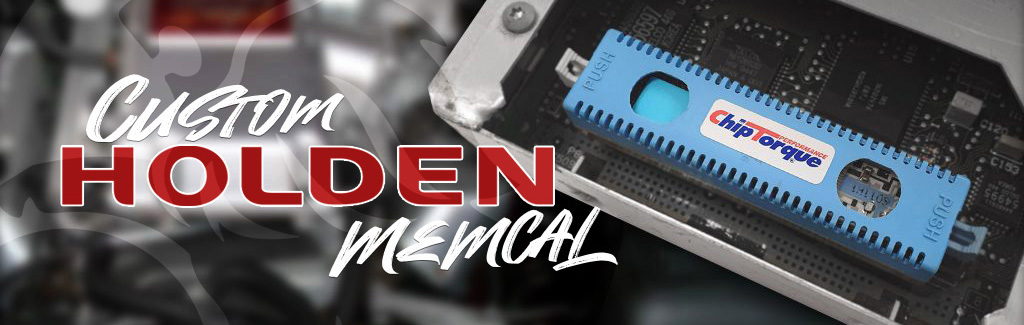
ChipTorque Custom Memcals require the base timing and idle to be set correctly in some models.
The XEDE Processor requires the correct timing pattern to be installed in order to find and lock onto the crank signal.
Introduction The Ezy-FLASH Pro allows you to store a library of modified tunes, enabling quick and easy ‘flashing’ of your car’s engine control unit to

Delco PCM – Fitting a 2 Bar MAP Sensor Wiring Connections ACDelco MAP sensors +5V Supply – CMAP Signal – BSensor Ground – A VS
A note on “cheap” alternatives.
Holden memcals are programmed from the factory with very specific configurations.
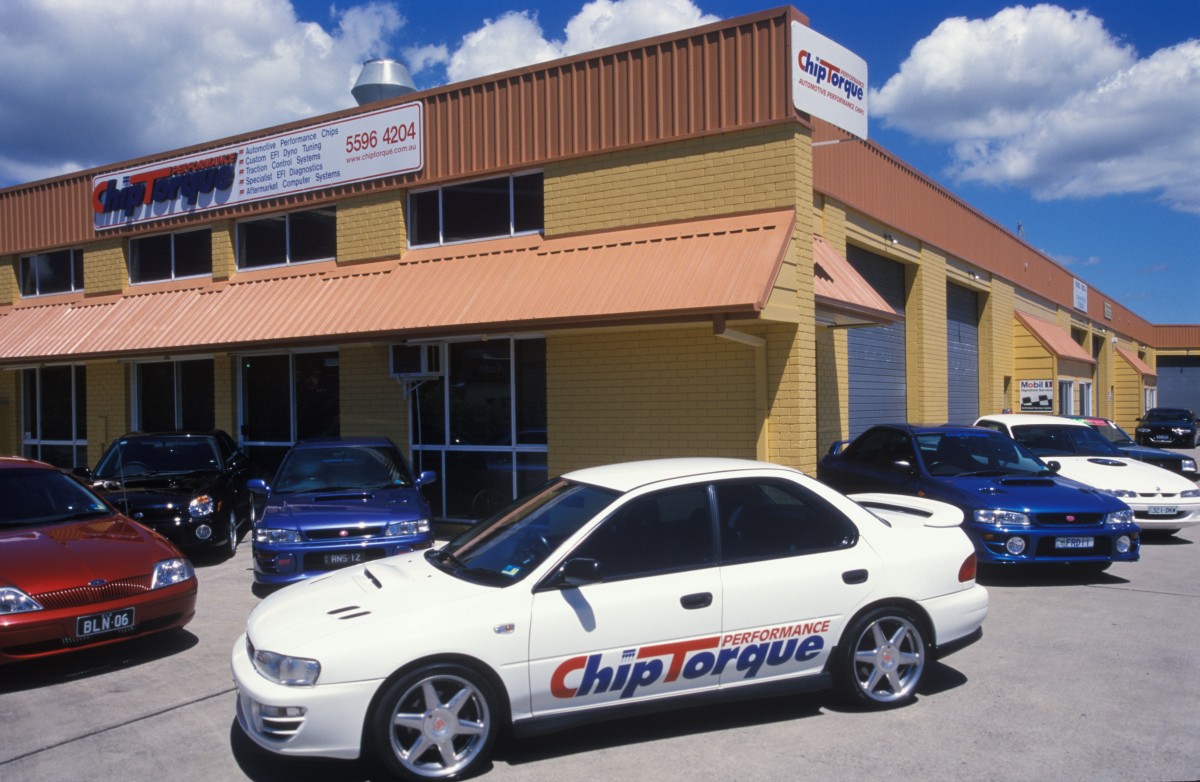
In the early 90’s finding EFI tuning solutions for the Australian market was near impossible. Our goal was to develop quality products to enable non-manufacturer based tuning for EFI performance enthusiasts.
In 1989 Lachlan Riddel (company founder) was awarded Queensland Apprentice of the Year (all trades) and received a scholarship with the Queensland Overseas Foundation. For 15 exciting and informative months he worked in England with an innovative company who specialised in aftermarket tuning. In July 1993 Lachlan returned to the Gold Coast and ChipTorque was open for business.
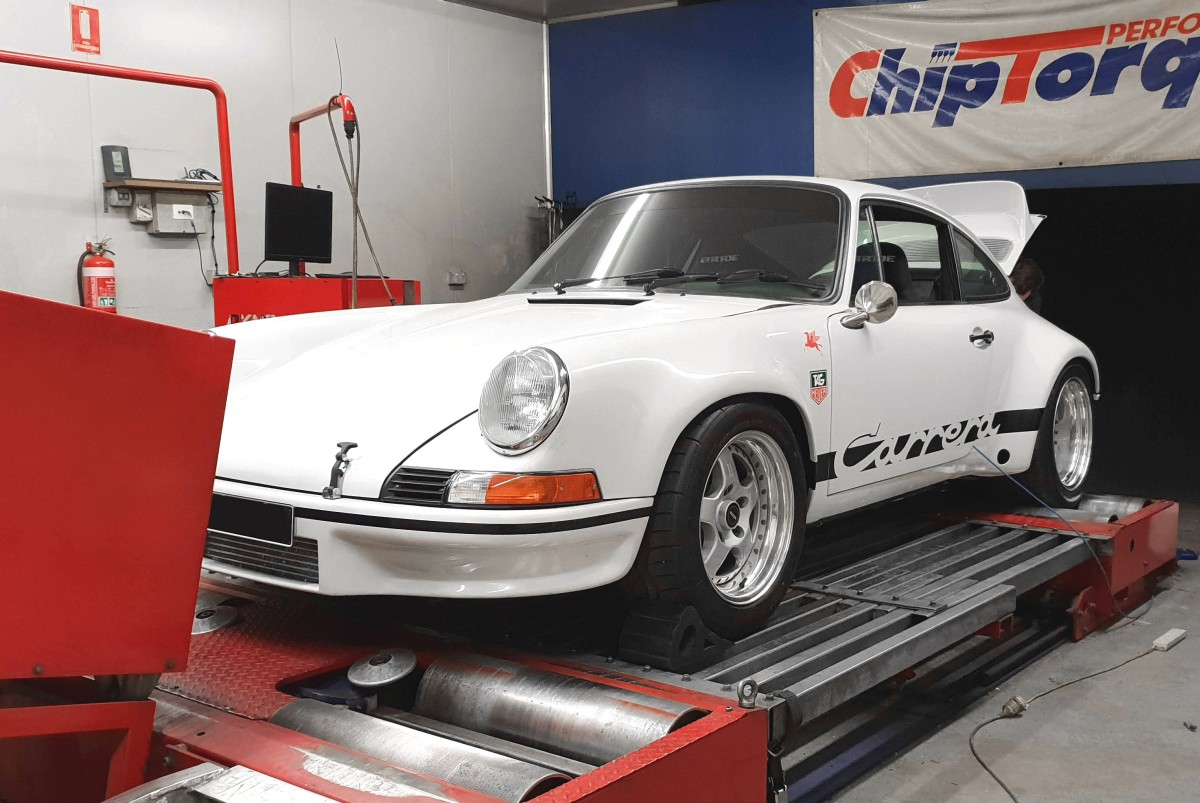
We first tuned EPROM based engine management systems for Porsche, BMW etc. As the demand increased, support for the Toyota MR2, Celica GT4 and VL Commodore was added.
Later, we designed our Performance Memcals for the VN-VT Commodores and J3 chips for EEC4 and EEC5 Falcons. With our hardware and calibration experience, we then released expansion boards for the Subaru RS Liberty, WRX and SR20 engined Nissans. We worked out the map structure and locations as much as we needed and tuned them throughout Australia and Internationally.
In early 2000, the need to tune cars with locked ECU’s led to the development of our XEDE Processor. This enabled modifications to the 99/00 WRX, various Toyota models and was very popular in the US for the BMW 335i and 135i. As engine control technology advanced into faster flash based storage, we started to design a product for the Australian market that was compatible with these models. Originally designed the Mitsubishi EVO’s, the Ezy-FLASH moved to support the Mazda 3/6 MPS and Subaru turbo models.
Our current focus is to continue to provide easy to use plug-in solutions with reliable, quality tuning, bred from decades of experience.
Over the years we have seen everything from mild street cars to highly modified race cars. We have grown to learn that not everyone wants a big peak horsepower number, instead words like smooth, responsive, reliable, and safe are more commonly used. Because of this we don’t change settings to unrealistic levels but find the best usable gains to get real results. Wherever a limiting parameter in the tune can be adjusted rather than deleted, we tune it to retain as much engine and drive line safety as possible.
Every tune is vehicle specific to get the right tune for the right vehicle. We keep every tune file we write and whenever possible, factory tune files are read and stored in our archives so that if needed the vehicle can be returned to its factory settings.
We aim to provide the most accurate programming possible with our products. However, we are also realistic and understand that not all vehicles and parts are the same and sometimes results are not as expected. When you buy a ChipTorque tuned product, you can trial it for up to a 2 week period from the purchase date.
If you are not satisfied during that time, please contact us to discuss if there is an improvement that we can make to your program. Depending on the issue and your location, we may need you to provide further information (eg. dyno graph, air fuel ratio, steps at idle, datalog, etc.) to assist us in making program improvements. If you are still unhappy, you can return the product in good working condition for a full refund of the purchase price*.
*The satisfaction guarantee covers the chip price only and does not include freight, installation, dyno time, labour, down time or any associated costs incurred consequently or inconsequently.
We supply tuning for the following makes and models. Direct links to the recommended supporting products are in ‘bold’ where possible. Please use as a guide only – factors such as ambient temp, tyre tread pattern, dyno brand/setup, fuel type etc will all have a radical effect on dyno readings.
Stage 1: ChipTorque Tuned SCT X4.
Adds approx 30kW / 140Nm (18%) peak power at the wheels.
Stage 1: ChipTorque Tuned SCT X4.
Adds approx 37kW / 120Nm (16%) peak power at the wheels.
Stage 1: ChipTorque Tuned SCT X4.
Adds approx 25kW / 105Nm (10%) peak power at the wheels.
Stage 2: Injectors and ChipTorque Tuned SCT X4
With larger injectors, you can run more boost. The Bosch 968’s retain the low rpm and part throttle drivability. Adds approx 35kW / 120Nm (17%) peak power at the wheels.
Stage 1: ChipTorque Tuned SCT X4.
Adds approx 30kW / 150Nm (10%) peak power at the wheels. Peak torque is made 400rpm earlier.
Stage 1: Aftermarket Exhaust, Extractors and Custom Memcal.
Adds approx 12kW / 40Nm (8%) peak power at the wheels.
Stage 1: Aftermarket Exhaust, Extractors and Custom Memcal.
Adds approx 20kW / 50Nm (17%) peak power at the wheels.
Stage 1: Aftermarket Exhaust, Extractors and Custom Memcal.
Adds approx 20kW / 50Nm (17%) peak power at the wheels.
Stage 1: Aftermarket Exhaust, Extractors and Tune.
Adds approx 40kW / 70Nm (22%) peak power at the wheels.
Stage 1: Aftermarket Exhaust, Extractors and Tune.
Adds approx 17kW / 50Nm (15%) peak power at the wheels.
Stage 1: Aftermarket Exhaust, Extractors and Tune.
Adds approx 25kW / 70Nm (9%) peak power at the wheels.
Stage 1: Supercharger Pulley Upgrade and Tune.
Adds approx 70kW / 410Nm (21%) peak power at the wheels.
Stage 1: Ezy-FLASH Pro.
Adds approx 18kW / 80Nm (12%) peak power at the wheels.
Stage 2: 3″ Turbo Back Exhaust, CES CAI and Ezy-FLASH Pro.
Adds approx 30kW / 100Nm (20%) peak power at the wheels.
Stage 1: Ezy-FLASH Pro.
Adds approx 23kW / 40Nm (14%) peak power at the wheels.
Stage 2: CES SRI and Ezy-FLASH Pro.
Adds approx 35kW / 100Nm (21%) peak power at the wheels.
Stage 3: 3″ Turbo Back Exhaust, CES SRI and Ezy-FLASH Pro.
Adds approx 42kW / 130Nm (26%) peak power at the wheels.
Stage 1: Ezy-FLASH Pro.
Adds approx 23kW / 40Nm (14%) peak power at the wheels.
Stage 2: CES SRI and Ezy-FLASH Pro.
Adds approx 35kW / 100Nm (21%) peak power at the wheels.
Stage 3: 3″ Turbo Back Exhaust, CES SRI and Ezy-FLASH Pro.
Adds approx 42kW / 130Nm (26%) peak power at the wheels.
Stage 1: Custom Performance Chip
Stage 1: Ezy-FLASH Pro.
Adds approx 15kW / 65Nm (14%) peak power at the wheels. Peak torque is made 700rpm earlier.
Stage 2: Exhaust with Ezy-FLASH Pro.
Adds approx 30kW / 110Nm (26%) peak power at the wheels.
We recommend the Invidia Q300 Turbo Back System. They are well made, fit nicely and have a weighty note without being too loud.
Stage 3: Turbo, Exhaust and Ezy-FLASH Pro.
Adds approx 60kW / 130Nm (48%) peak power at the wheels. Torque and Power is stronger higher in the rev range.
We generally recommend the VF34 for the 2.0L. It’s a proven turbo choice that has a good street power band. With this level of modification (and age of the car), it’s a good idea to upgrade the fuel pump at the same time.
Stage 1: Ezy-FLASH Pro.
Adds approx 20kW / 40Nm (12%) peak power at the wheels.
Stage 2: Exhaust with Ezy-FLASH Pro.
Adds approx 33kW / 90Nm (21%) peak power at the wheels.
Stage 1: Ezy-FLASH Pro.
Adds approx 19kW / 70Nm (14%) peak power at the wheels. Peak torque is made 500rpm earlier.
Stage 2: Exhaust with Ezy-FLASH Pro.
Adds approx 31kW / 100Nm (23%) peak power at the wheels.
We recommend the Invidia Q300 Turbo Back System. They are well made, fit nicely and have a weighty note without being too loud.
Stage 3: Turbo, Exhaust and Ezy-FLASH Pro.
Adds approx 65kW / 180Nm (50%) peak power at the wheels. Torque and Power is stronger higher in the rev range.
We generally recommend the VF34. It’s a proven turbo choice that has a good street power band. With this level of modification (and age of the car), it’s a good idea to upgrade the fuel pump at the same time. A CAI and Intercooler adds to the boost consistency at this point.
Stage 1: Ezy-FLASH Pro.
Adds approx 15kW / 40Nm (9%) peak power at the wheels.
Stage 2: Exhaust with Ezy-FLASH Pro.
Adds approx 35kW / 130Nm (21%) peak power at the wheels.
Stage 1: Ezy-FLASH Pro.
Adds approx 15kW / 50Nm (12%) peak power at the wheels. The power and torque curves are much more linear compared to standard.
Stage 2: Exhaust with Ezy-FLASH Pro.
Adds approx 25kW / 80Nm (20%) peak power at the wheels. Peak torque is made 800rpm earlier.
Stage 3: Turbo, Exhaust and Ezy-FLASH Pro.
Adds approx 55kW / 130Nm (40%) peak power at the wheels. Torque and Power is stronger higher in the rev range.
We generally recommend the VF34. It’s a proven turbo choice that has a good street power band. With this level of modification (and age of the car), it’s a good idea to upgrade the fuel pump at the same time.
Stage 1: Ezy-FLASH Pro.
Adds approx 20kW / 75Nm (16%) peak power at the wheels.
Stage 2: Exhaust with Ezy-FLASH Pro.
Adds approx 31kW / 90Nm (22%) peak power at the wheels.
Stage 3: Turbo, Exhaust and Ezy-FLASH Pro.
Adds approx 40kW / 150Nm (30%) peak power at the wheels. Torque and Power is stronger higher in the rev range.
We generally see the VF48 as a common upgrade. A CAI and Intercooler adds to the boost consistency at this point.
Stage 1: Ezy-FLASH Pro.
Adds approx 18kW / 100Nm (13%) peak power at the wheels. Peak power is made 1000rpm earlier.
Stage 2: Exhaust with Ezy-FLASH Pro.
Adds approx 30kW / 150Nm (22%) peak power at the wheels.
We recommend the Invidia Q300 Turbo Back System. They are well made, fit nicely and have a weighty note without being too loud.
The Ezy-FLASH Pro allows you to store a library of modified tunes, enabling quick and easy ‘flashing’ of your car’s engine control unit to increase performance, drivability and support aftermarket modifications. The plug-in unit can read and clear trouble codes, record high speed logs, display live data and performance metrics. The factory tune is also stored within the unit so that the car can be returned to stock at any time.
The Ezy-FLASH Pro must NEVER be used by the driver while the vehicle is in motion! Doing so is illegal, and is a danger to you, your vehicle, and others.
NEVER drive your vehicle with any cables connected (including Ezy-FLASH Pro cables) that may interfere with vehicle controls.
Reflashing your vehicle with the Ezy-FLASH Pro unit may void all or part of your manufacturer’s warranty. Other than product quality guarantee, there are no guarantees with the Ezy-FLASH Pro, either express or implied by ChipTorque or any Ezy-FLASH Pro dealers. The user accepts all risks and responsibilities when using the Ezy-FLASH Pro.
Ensure your vehicle battery is fully charged and its condition is good before beginning any reflashing process, including changing maps, locking, and unlocking the Ezy-FLASH Pro. Reflashing with insufficient battery energy may cause a reflash error, which may damage your ECU and prevent your vehicle from starting.
DO NOT disturb the vehicle, cables, or ECU during the reflashing process, including changing maps, locking, and unlocking the Ezy-FLASH Pro. Interrupting the reflash process may cause a reflash error, which may damage your ECU and prevent your vehicle from starting.
DO NOT attempt any repairs on the Ezy-FLASH Pro unit. No user-serviceable parts inside. In the unlikely event of an Ezy-FLASH Pro device failure, contact the place of purchase and return the unit to them for repairs.
You get a whole set of tuning maps included when you purchase the Ezy-FLASH Pro product. Exactly which ones you get depend on the vehicle type, and it’s modifications. Usually you will get at least the following maps bundled with your Ezy-FLASH Pro:
Additional Tune Sets can be purchased from ChipTorque directly.
The Ezy-FLASH Pro unit is programmed with the latest firmware available at the time of manufacture. It is possible that a newer version is available, and it is recommended that you always use the latest available version.
NOTE: Some updates require the Ezy-FLASH Pro to be unlocked before updating. If so, Tune Manager will inform you. If your Ezy-FLASH Pro is locked to your vehicle, you will need to follow the unlocking procedure.
It is also possible that some refinements are made to the menu structure from version to version. This may mean that the examples shown in this User Manual do not correlate exactly to your Ezy-FLASH Pro unit.
Ensure your vehicle battery is fully charged and its condition is good before beginning any reflashing process, including changing maps, locking, and unlocking the Ezy-FLASH Pro. To minimise the power drain from the battery during reflashing operations, we recommend you turn off all accessories, including lights, entertainment systems / radios, fans / air conditioner, etc. As an extra precaution, an external battery charger may be added to the vehicle, although this is normally unnecessary with a healthy, charged battery.
Note: Tuning Programs are sometimes called Tunes, ROMs, or Maps. These terms may be used interchangeably in this document. The exact text shown on the LCD windows in this document may differ from those on your Ezy-FLASH Pro screen.
Note: The first time you connect your Ezy-FLASH Pro to your vehicle, the Ezy-FLASH Pro must establish a partnership with your vehicle (“Locking”). During this phase, the Ezy-FLASH Pro will query the vehicle type and check that it is compatible with the Tune you have selected. It will then read and verify the maps in the ECU (“Initial Tune”), so your vehicle can be unlocked and fully returned to it’s original program if desired.
DO NOT DISTURB the Ezy-FLASH Pro, cables, or vehicle during the reflashing or locking process. Doing so may render your vehicle inoperable. This event is not warranted.
Note: Trouble Codes are also known as “Diagnostic Trouble Codes”, or “DTCs” for short. Most modern vehicles, including Subaru, store two sets of DTCs – Current and Historic. Current codes indicate problems that the vehicle still experiencing. Historic codes indicate a problem that has happened in the past, but is not exhibiting itself presently.
Subaru vehicles clear historic and current DTCs by resetting the ECU. This has an unfortunate side effect; it also clears all other learned data in the ECU. One of these parameters – the Ignition Advance Multiplier - controls additional timing advance, and when it is reset, your vehicle may temporarily lose significant power (up to around 20wkW). All of this data will be re-learned over time and your vehicle performance will improve accordingly.
You can view up to 4 parameters at a time live (in real-time) using this feature. Data logging can be used on any compatible vehicle, not only the ‘locked’ vehicle.
DO NOT view live data while driving on road.
Note: Data parameters may differ from those shown. Most versions may support multiple screens of live data. Scroll through screens using UP and DOWN buttons. Some parameters may not be available on all vehicle types. In this case alternate parameters may be used, or the allocated space will remain blank.
Below is a list of parameters that may be available when using Live Data View.
NOTE: Some parameters may not be available for all vehicles.
Some values are displayed in Metric or Imperial units. Select your preferred Units System from the Setup menu.
RPM | Engine Speed in Revs Per Minute |
LI | Learned Ignition Timing. The amount of timing advance added by the ECU’s learning table to the base timing. Negative values retard timing. (°) |
KC | Knock Correction Advance. Equivalent to Learned Ignition Timing (°) |
MAP | Manifold Absolute Pressure |
Inj | Injector (1) duty cycle (%) |
WGD | Turbo Wastegate Solenoid duty cycle (%) |
Ld | Engine Load (relative %) |
MAF | Mass Air Flow (grams/second) |
AFR | Air/Fuel ratio |
AFC | Air/Fuel Correction (%). |
AFL | Air/Fuel Learning (%) |
Spk | Spark Advance / Ignition Total Timing (° BTDC) |
VSS | Vehicle Speed Sensor |
TPS | Throttle Position Sensor (%) |
APP | Accelerator Pedal Position (%). DBW vehicles only |
Vb | Battery voltage |
IAT | Intake Air Temperature |
Parameters displayed using Live Data View are for information only. ChipTorque accepts no responsibility for damage arising from inaccurate or misleading parameter data.
You can select which parameters are logged using High-Speed Data Logging. Use Tune Manager to set up these parameters. If no parameters are specified, a default set of parameters will be used. Data logging can be used on any compatible vehicle, not only the ‘locked’ vehicle.
The Ezy-FLASH Pro allocates 10Mb for data logging. Depending on the number of parameters selected and the vehicle type, this may give a total continuous logging time of approximately 3 to 20 days.
Note: This section is only relevant for people who wish to use their Ezy-FLASH Pro with multiple vehicles with different ECU styles. An example of when this may occur is if the Ezy-FLASH Pro is sold to a user with a different vehicle type or year model.
The Ezy-FLASH Pro is supplied with the ability to function fully with any supported Subaru vehicle.
There are 3 Subaru ECU styles supported by Ezy-FLASH Pro. Ezy-FLASH Pro comes pre-installed with a single license which may be applied to either ECU style. This license applies to the first vehicle type the Ezy-FLASH Pro t is locked to. Ezy-FLASH Pro can be used on any other vehicles that have the same ECU style.
Before the Ezy-FLASH Pro can be used on vehicles with a different ECU style, a new license must be installed. Contact your Ezy-FLASH Pro supplier for information on purchasing additional licenses if required.
The 3 supported Subaru ECU Styles belong in the following vehicles groups:
The year model overlaps are a guide only, since this varies between sales regions.
The Ezy-FLASH Pro is designed to operate at between 0°C and 40°C (32°F-104°F) at less than 90% relative humidity, although the display contrast may suffer at the extremes of this temperature range.
Using the Ezy-FLASH Pro outside of this temperature range may cause damage to the unit, and/or may cause it to not operate correctly. Never leave or store the Ezy-FLASH Pro in direct sunlight! Recommended storage temperature is –20°C-50°C (0°F-122°F).
Do not use the Ezy-FLASH Pro if the relative humidity is above 90%. DO NOT allow the Ezy-FLASH Pro to get wet!!!
The Ezy-FLASH Pro unit is not air-tight. In very cold or humid environments there is a likelihood that condensation will form inside the unit; you would see this as dew on the display window.
It is not advisable to reflash your vehicle when condensation exists inside the unit as this may affect the electronics.
Handle the Ezy-FLASH Pro with care. Do not subject the Ezy-FLASH Pro or any of its related parts to excessive shock or vibration, including dropping the unit.
Do not store the Ezy-FLASH Pro where it may be subject to strong vibration, extremes of moisture (> 90% humidity), extreme temperatures, or places that may expose it to direct sunlight.
Clean the outside of the Ezy-FLASH Pro with a soft cloth and mild detergent or cleaning spirit/methylated spirits/denatured alcohol. Do not allow fluid to run inside the case.
Excessive pressure and rubbing may cause damage to the exterior of the Ezy-FLASH Pro.
Do not attempt to open the Ezy-FLASH Pro unit! Doing so will not only void the factory warranty, it also puts the internal circuitry at risk of damage from static shock, among other things. There are no user-serviceable parts inside.
Symptom | Probable Causes & Solutions |
Cannot connect (locking, reflashing, or unlocking) |
|
Cannot connect (DTCs, data logging) |
|
Reflash failed |
|
Vehicle not recognised |
|
The benefits provided by this Warranty are in addition to all other rights and remedies in respect of the product which the consumer has under the Trades Practices Act 1974 and/ or any other State and Territory Laws. The original purchaser of the ChipTorque product is provided with the following Warranty subject to the Warranty Conditions:
ChipTorque warrants this product for all parts defective in workmanship or materials for the period of 12 months.
DBW | Drive-By-Wire, where the accelerator pedal is not directly connected to the throttle plate. Instead, the throttle plate angle is controlled electronically by the ECU. |
DTC | Diagnostic Trouble Code. DTCs are stored in the vehicle’s ECU if it detects a problem in the vehicle system. Each code is unique and corresponds to a specific problem. |
Dynamometer | “Dyno”. Equipment for measuring power and torque output of a vehicle (“chassis dyno”) or an engine (“engine dyno”). |
ECU | Engine Control Unit. A computer that controls delivery of fuel, timing of spark, and many other parameters to make an engine operate. |
Flash | Flash memory. Stores the tuning maps (and other engine control code) in the ECU. |
Initial ROM | The control code that existed in your ECU before the Ezy-Flash was introduced. |
wKw | Wheel Kilowatts. The power produced at the wheels. This is the power at the flywheel less transmission and drivetrain losses. |
Reflash | To reprogram the tuning maps and engine control code in the ECU. |
ROM | “Read Only Memory”. In this context, ROM describes a computer program that alters the tuning maps in a vehicle. Also called a ‘Tune’. |
TC | Throttle Cable. ‘Conventional’ throttle control where accelerator pedal is directly connected to the throttle blade using a cable. Opposite to DBW. |
TMC | Test Mode Connector. Used to initiate reflash mode in many vehicles. |
TMSA | Test Mode Switch Assembly. Provides convenient access to Test Mode Connectors. |
Tune | A computer program that alters the tuning maps in a vehicle. Also called a ‘ROM’. |
Tune Bank | A collection of Tune Sets. |
Tune Set | A set of tunes which apply to a single vehicle type. |
Tuning Maps | Data tables that describe to the ECU the correct amount of a physical quantity (i.e., fuel, ignition timing, turbo boost pressure) to apply to a vehicle under a predefined set of conditions (e.g., engine speed, engine load, requested throttle / torque, ambient conditions, etc). |
The base timing should be set to (factory recommended) 10degrees BTDC with timing light and can be checked / set at any RPM below 2,000rpm in diagnostic mode.
You can check you are correctly in the diagnostic mode if there is no CEL etc. by testing that: above the 2,000rpm point, the timing will change from a fixed value 10Deg BTDC to normal variable timing of more than 30Deg BTDC. As the RPM is reduced to below 2000rpm again, it will return to the fixed setting value that should be 10deg BTDC.
Hint: For large cams or lumpy idle applications, raise the engine RPM to 1,500rpm with an assistant or feeler gauges under the throttle stop screw to reduce timing “shake” while setting it. Remember to keep RPM below 2,000rpm while setting the timing.
V6 engines have no timing to set.
VN – VP V8
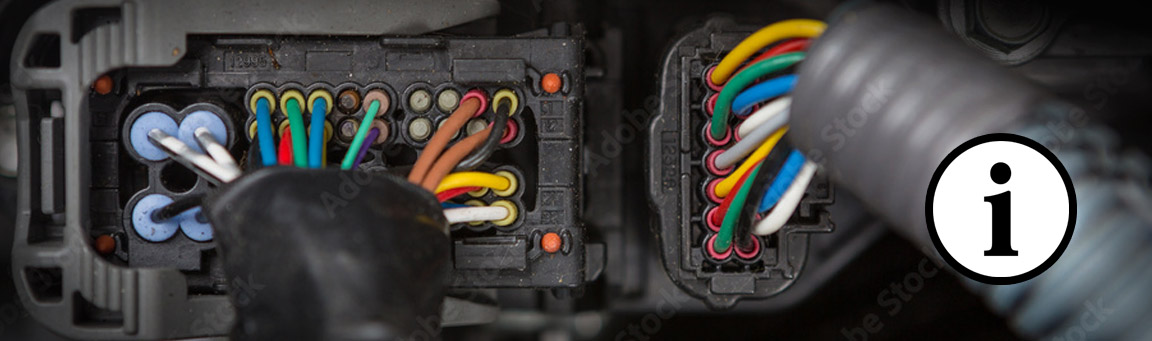
Link pins in the ALDL connector (white square plug on wiring loom approximately 15cm from ECU on the main engine harness). At one end of the ALDL connector link 2 wires above and below one another (black with white trace and white with black trace). ChipTorque recommends a very fine metal paperclip or split pin as the best tool to use. If the link is correct, with the engine running the check engine light will now flash on and off about once per second.
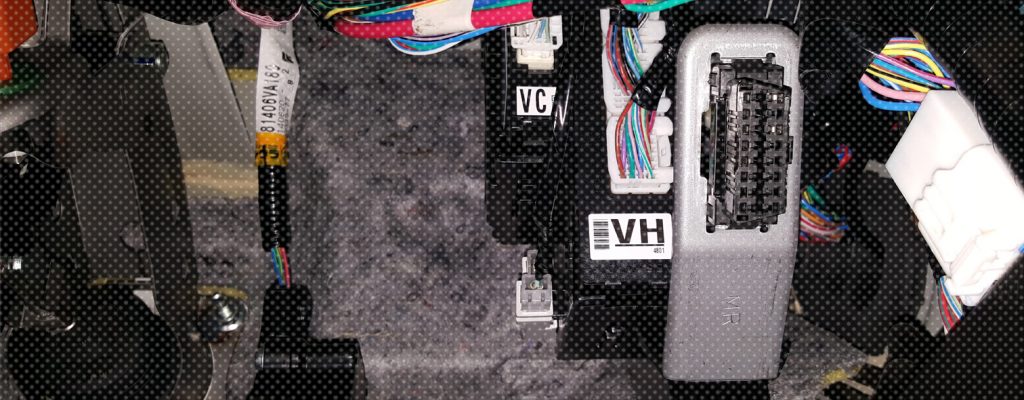
VR – VT V8
Link pin 5 (black with white trace wire or straight black wire) and pin 6 (white with black trace wire) on the 16pin OBD diagnostic plug under the steering wheel at the bottom of the trim panel. ChipTorque recommend a very fine metal paperclip or split pin as the best tool to use. If the link is correct, with the engine running the check engine light will now flash on and off about once per second.
No Diagnostic Plug
If the engine is transplanted and the OBD / ALDL plug is not available, connect the Diagnostic request wire (white with black trace wire) to ground. Diagnostic Request wire:
VN – VP All ECU pin A9
VR – VS Manual ECU pin A9
VR – VS Auto PCM pin D6
VSIII or VT V8 PCM pin F14
If the ECU has been removed, or battery power has been disconnected, the first start will require an idle relearn including IAC reset. The ECU will do this automatically on first start once the engine RPM exceeds 2,500rpm for greater than 4 seconds.
To start the process manually:
To complete the idle relearn:
If a scan tool is available:
If no scan tool is available:
Make small incremental adjustments as required with ignition OFF and allow the idle to relearn each time as described above.
As a guide: With the IAC passage fully blocked off (temporarily, with tape or a finger) the idle screw should be set to achieve an idle approximately 50-100RPM less than the “Desired Idle” speed set in the Chip; (call ChipTorque with your Chip Serial Number for application specifics if you are not sure).