
Introduction
The Ezy-FLASH Pro allows you to store a library of modified tunes, enabling quick and easy ‘flashing’ of your car’s engine control unit to increase performance, drivability and support aftermarket modifications. The plug-in unit can read and clear trouble codes, record high speed logs, display live data and performance metrics. The factory tune is also stored within the unit so that the car can be returned to stock at any time.
Important Safety Information
Safety Warning
The Ezy-FLASH Pro must NEVER be used by the driver while the vehicle is in motion! Doing so is illegal, and is a danger to you, your vehicle, and others.
Safety Warning
NEVER drive your vehicle with any cables connected (including Ezy-FLASH Pro cables) that may interfere with vehicle controls.
Warning - Vehicle Warranty
Reflashing your vehicle with the Ezy-FLASH Pro unit may void all or part of your manufacturer’s warranty. Other than product quality guarantee, there are no guarantees with the Ezy-FLASH Pro, either express or implied by ChipTorque or any Ezy-FLASH Pro dealers. The user accepts all risks and responsibilities when using the Ezy-FLASH Pro.
Warning - Battery
Ensure your vehicle battery is fully charged and its condition is good before beginning any reflashing process, including changing maps, locking, and unlocking the Ezy-FLASH Pro. Reflashing with insufficient battery energy may cause a reflash error, which may damage your ECU and prevent your vehicle from starting.
Warning - Reflashing
DO NOT disturb the vehicle, cables, or ECU during the reflashing process, including changing maps, locking, and unlocking the Ezy-FLASH Pro. Interrupting the reflash process may cause a reflash error, which may damage your ECU and prevent your vehicle from starting.
Warning - Repairs
DO NOT attempt any repairs on the Ezy-FLASH Pro unit. No user-serviceable parts inside. In the unlikely event of an Ezy-FLASH Pro device failure, contact the place of purchase and return the unit to them for repairs.
Tuning Maps
You get a whole set of tuning maps included when you purchase the Ezy-FLASH Pro product. Exactly which ones you get depend on the vehicle type, and it’s modifications. Usually you will get at least the following maps bundled with your Ezy-FLASH Pro:
- Factory (unmodified tune)
- Anti-theft program (car will not start)
- Valet (low rev limit, low speed limit)
- 95 Octane (medium performance, tuned for lower octane)
- 98 Octane Low Boost (low boost, premium fuel)
- 98 Octane High Boost (performance tune, premium fuel)
Additional Tune Sets can be purchased from ChipTorque directly.
Check For Updates
The Ezy-FLASH Pro unit is programmed with the latest firmware available at the time of manufacture. It is possible that a newer version is available, and it is recommended that you always use the latest available version.
NOTE: Some updates require the Ezy-FLASH Pro to be unlocked before updating. If so, Tune Manager will inform you. If your Ezy-FLASH Pro is locked to your vehicle, you will need to follow the unlocking procedure.
It is also possible that some refinements are made to the menu structure from version to version. This may mean that the examples shown in this User Manual do not correlate exactly to your Ezy-FLASH Pro unit.
Important Battery Warning
Ensure your vehicle battery is fully charged and its condition is good before beginning any reflashing process, including changing maps, locking, and unlocking the Ezy-FLASH Pro. To minimise the power drain from the battery during reflashing operations, we recommend you turn off all accessories, including lights, entertainment systems / radios, fans / air conditioner, etc. As an extra precaution, an external battery charger may be added to the vehicle, although this is normally unnecessary with a healthy, charged battery.
Connect The Ezy-FLASH Pro
- Connect the OBDII cable to the Ezy-FLASH Pro and secure the jackscrews.
- With the key in the OFF position, connect the OBDII cable to the Vehicle.
- The Ezy-FLASH Pro will start up immediately and display version and other information.
- “Ezy-FLASH Pro VIN Locked” will be displayed if the Ezy-FLASH Pro is locked to a vehicle.
Select A Tuning Program
Note: Tuning Programs are sometimes called Tunes, ROMs, or Maps. These terms may be used interchangeably in this document. The exact text shown on the LCD windows in this document may differ from those on your Ezy-FLASH Pro screen.
- From Main menu, select “Change Map”. The second line describes the name of the currently installed tuning map.
- Navigate the menus to select a Tune Set that best matches your vehicle type.
- Select a Tune from the Tune Set that best suits your vehicle.
- Press SELECT to view Tune information. Use Up/Down to scroll through pages. Press SELECT when done.
Note: The first time you connect your Ezy-FLASH Pro to your vehicle, the Ezy-FLASH Pro must establish a partnership with your vehicle (“Locking”). During this phase, the Ezy-FLASH Pro will query the vehicle type and check that it is compatible with the Tune you have selected. It will then read and verify the maps in the ECU (“Initial Tune”), so your vehicle can be unlocked and fully returned to it’s original program if desired.
Warning - Reflashing
DO NOT DISTURB the Ezy-FLASH Pro, cables, or vehicle during the reflashing or locking process. Doing so may render your vehicle inoperable. This event is not warranted.
Trouble Codes
Note: Trouble Codes are also known as “Diagnostic Trouble Codes”, or “DTCs” for short. Most modern vehicles, including Subaru, store two sets of DTCs – Current and Historic. Current codes indicate problems that the vehicle still experiencing. Historic codes indicate a problem that has happened in the past, but is not exhibiting itself presently.
- Connect the Ezy-FLASH Pro to your vehicle
- From Main menu, select “Read/Clear Codes”
- From the Codes Menu, select either
- Read Codes
- Select Current or Historic Codes
- Inspect all codes
Press SELECT to read information on each code
- Clear Codes
- Select “Clear Trouble Codes”
- Turn key off to reset ECU
- Read Codes
ECU Reset
Subaru vehicles clear historic and current DTCs by resetting the ECU. This has an unfortunate side effect; it also clears all other learned data in the ECU. One of these parameters – the Ignition Advance Multiplier - controls additional timing advance, and when it is reset, your vehicle may temporarily lose significant power (up to around 20wkW). All of this data will be re-learned over time and your vehicle performance will improve accordingly.
Live Data View
You can view up to 4 parameters at a time live (in real-time) using this feature. Data logging can be used on any compatible vehicle, not only the ‘locked’ vehicle.
Safety Warning
DO NOT view live data while driving on road.
- Connect the Ezy-FLASH Pro to your vehicle
- Start Vehicle
- From Main menu, select “Data Logging”
- From the Data Logging Menu, select “Live Data View”
- Ezy-FLASH Pro is now displaying live data parameters
- Press ‘SELECT’ to stop viewing Live Data .
Note: Data parameters may differ from those shown. Most versions may support multiple screens of live data. Scroll through screens using UP and DOWN buttons. Some parameters may not be available on all vehicle types. In this case alternate parameters may be used, or the allocated space will remain blank.
Live Data View Parameters
Below is a list of parameters that may be available when using Live Data View.
NOTE: Some parameters may not be available for all vehicles.
Some values are displayed in Metric or Imperial units. Select your preferred Units System from the Setup menu.
RPM | Engine Speed in Revs Per Minute |
LI | Learned Ignition Timing. The amount of timing advance added by the ECU’s learning table to the base timing. Negative values retard timing. (°) |
KC | Knock Correction Advance. Equivalent to Learned Ignition Timing (°) |
MAP | Manifold Absolute Pressure |
Inj | Injector (1) duty cycle (%) |
WGD | Turbo Wastegate Solenoid duty cycle (%) |
Ld | Engine Load (relative %) |
MAF | Mass Air Flow (grams/second) |
AFR | Air/Fuel ratio |
AFC | Air/Fuel Correction (%). |
AFL | Air/Fuel Learning (%) |
Spk | Spark Advance / Ignition Total Timing (° BTDC) |
VSS | Vehicle Speed Sensor |
TPS | Throttle Position Sensor (%) |
APP | Accelerator Pedal Position (%). DBW vehicles only |
Vb | Battery voltage |
IAT | Intake Air Temperature |
Disclaimer
Parameters displayed using Live Data View are for information only. ChipTorque accepts no responsibility for damage arising from inaccurate or misleading parameter data.
Data Logging
You can select which parameters are logged using High-Speed Data Logging. Use Tune Manager to set up these parameters. If no parameters are specified, a default set of parameters will be used. Data logging can be used on any compatible vehicle, not only the ‘locked’ vehicle.
- Connect the Ezy-FLASH Pro to your vehicle.
- START VEHICLE.
- From Main menu, select “Data Logging”.
- From the Data Logging Menu, select “High Speed Log”.
- Press ‘SELECT’ to start logging.
- Ezy-FLASH Pro is now data logging as per the parameters set up in advance.
- Press ‘SELECT’ to stop data logging.
The Ezy-FLASH Pro allocates 10Mb for data logging. Depending on the number of parameters selected and the vehicle type, this may give a total continuous logging time of approximately 3 to 20 days.
Viewing Logged Data
- Start Tune Manager.
- Connect your Ezy-FLASH Pro to the PC using the USB cable supplied. The first time you connect your Ezy-FLASH Pro, you will have to install drivers for it.
- Click the “Data Log Settings” button on the toolbar, or select “Data Log Settings” from the “Ezy-FLASH” menu.
- In the “Retrieve Log Data” tab, a list of available data logs will be displayed. Select the ones you wish to download.
- Click “Browse” and select a location and base name for the output files. The base name begins the name of all log files to be saved. These files are numbered sequentially.
For example:
Test Log 0001.csv
Test Log 0002.csv
Test Log 0003.csv - Click “Save Logs To Files” to download the data and save them in numbered files.
- Click “Data Log Viewer” in the Data Logging window, or the Data Log Viewer icon on the main window toolbar. In the following window, select the log file you wish to view. You may need to navigate to the folder where the files were saved.
- Right-click in the graph window and select “Edit group channels”.
- Drag channels into channel groups. Right-click in the left window area to create new channel groups. Edit channels to change colours and other display parameters.
- Use the mouse and/or cursor keys to navigate around and view the logged data.
Navigation
- The mouse scroll wheel zooms in and out; hold down CTRL and scroll wheel pans.
- Cursor keys zoom and pan; hold down SHIFT for finer resolution.
- Click the channel labels to highlight that channel and show its y-axis.
- Right-click the channel labels to edit the channel, remove it from the channel group, or temporarily hide it.
- Edit the channel and edit its display range and colour if required.
Licensing
Note: This section is only relevant for people who wish to use their Ezy-FLASH Pro with multiple vehicles with different ECU styles. An example of when this may occur is if the Ezy-FLASH Pro is sold to a user with a different vehicle type or year model.
The Ezy-FLASH Pro is supplied with the ability to function fully with any supported Subaru vehicle.
There are 3 Subaru ECU styles supported by Ezy-FLASH Pro. Ezy-FLASH Pro comes pre-installed with a single license which may be applied to either ECU style. This license applies to the first vehicle type the Ezy-FLASH Pro t is locked to. Ezy-FLASH Pro can be used on any other vehicles that have the same ECU style.
Before the Ezy-FLASH Pro can be used on vehicles with a different ECU style, a new license must be installed. Contact your Ezy-FLASH Pro supplier for information on purchasing additional licenses if required.
The 3 supported Subaru ECU Styles belong in the following vehicles groups:
- WRX/STi MY01-05 (Throttle Cable control)
- WRX/STi/FXT/LGT MY04-07 (Drive By Wire, serial reflashing)
- WRX/STi/FXT/LGT MY08-10 (Drive By Wire, CAN reflashing)
The year model overlaps are a guide only, since this varies between sales regions.
Environmental Information
Operating and Storage Temperatures
The Ezy-FLASH Pro is designed to operate at between 0°C and 40°C (32°F-104°F) at less than 90% relative humidity, although the display contrast may suffer at the extremes of this temperature range.
Using the Ezy-FLASH Pro outside of this temperature range may cause damage to the unit, and/or may cause it to not operate correctly. Never leave or store the Ezy-FLASH Pro in direct sunlight! Recommended storage temperature is –20°C-50°C (0°F-122°F).
Humidity and Moisture
Do not use the Ezy-FLASH Pro if the relative humidity is above 90%. DO NOT allow the Ezy-FLASH Pro to get wet!!!
The Ezy-FLASH Pro unit is not air-tight. In very cold or humid environments there is a likelihood that condensation will form inside the unit; you would see this as dew on the display window.
It is not advisable to reflash your vehicle when condensation exists inside the unit as this may affect the electronics.
Handling and Storage
Handle the Ezy-FLASH Pro with care. Do not subject the Ezy-FLASH Pro or any of its related parts to excessive shock or vibration, including dropping the unit.
Do not store the Ezy-FLASH Pro where it may be subject to strong vibration, extremes of moisture (> 90% humidity), extreme temperatures, or places that may expose it to direct sunlight.
Cleaning
Clean the outside of the Ezy-FLASH Pro with a soft cloth and mild detergent or cleaning spirit/methylated spirits/denatured alcohol. Do not allow fluid to run inside the case.
Excessive pressure and rubbing may cause damage to the exterior of the Ezy-FLASH Pro.
User Repairs
Do not attempt to open the Ezy-FLASH Pro unit! Doing so will not only void the factory warranty, it also puts the internal circuitry at risk of damage from static shock, among other things. There are no user-serviceable parts inside.
OPENING THE EZY-FLASH PRO UNIT YOURSELF WILL VOID THE WARRANTY
Troubleshooting
Symptom | Probable Causes & Solutions |
Cannot connect (locking, reflashing, or unlocking) |
|
Cannot connect (DTCs, data logging) |
|
Reflash failed |
|
Vehicle not recognised |
|
Warranty
CHIPTORQUE PRODUCT WARRANTY
The benefits provided by this Warranty are in addition to all other rights and remedies in respect of the product which the consumer has under the Trades Practices Act 1974 and/ or any other State and Territory Laws. The original purchaser of the ChipTorque product is provided with the following Warranty subject to the Warranty Conditions:
ChipTorque warrants this product for all parts defective in workmanship or materials for the period of 12 months.
WARRANTY CONDITIONS
- This product must be used in accordance with manufacturer’s instructions. This Warranty does not apply should the defect or failure of the product be attributable to misuse, abuse, accident or non-observance of manufacturer’s instructions on the part of the user. The manufacturer does not accept liability for any direct or consequential loss, damage or other expense caused by or arising out of the use of the product.
- This Warranty does not cover normal wear and tear. Exhaustible components of the product are included under this Warranty only where there is a defect in workmanship or materials used.
- This Warranty is immediately void if-
3.1 any serial number or appliance plate is removed or defected;
3.2 the product has been serviced or otherwise repaired by a person not authorised to do so by ChipTorque or where non-approved replacement parts are made. - This product is designed for domestic use only. A limited 90-day Warranty applies to any industrial or commercial use of the product. This product must be connected to the electrical voltage requirements as specified in the ratings label located on the product.
- This Warranty will only be provided where proof of original purchase is presented, for example original receipt or invoice.
- ChipTorque may, at its own discretion, replace or repair any defective product. Any parts of the product replaced during repairs or any product replaced remain the property of ChipTorque. In the event of a product being replaced during the Warranty period, the Warranty on the replacement product will expire on the same date as for the Warranty period on the original product which is replaced.
Glossary Of Common Terms
DBW | Drive-By-Wire, where the accelerator pedal is not directly connected to the throttle plate. Instead, the throttle plate angle is controlled electronically by the ECU. |
DTC | Diagnostic Trouble Code. DTCs are stored in the vehicle’s ECU if it detects a problem in the vehicle system. Each code is unique and corresponds to a specific problem. |
Dynamometer | “Dyno”. Equipment for measuring power and torque output of a vehicle (“chassis dyno”) or an engine (“engine dyno”). |
ECU | Engine Control Unit. A computer that controls delivery of fuel, timing of spark, and many other parameters to make an engine operate. |
Flash | Flash memory. Stores the tuning maps (and other engine control code) in the ECU. |
Initial ROM | The control code that existed in your ECU before the Ezy-Flash was introduced. |
wKw | Wheel Kilowatts. The power produced at the wheels. This is the power at the flywheel less transmission and drivetrain losses. |
Reflash | To reprogram the tuning maps and engine control code in the ECU. |
ROM | “Read Only Memory”. In this context, ROM describes a computer program that alters the tuning maps in a vehicle. Also called a ‘Tune’. |
TC | Throttle Cable. ‘Conventional’ throttle control where accelerator pedal is directly connected to the throttle blade using a cable. Opposite to DBW. |
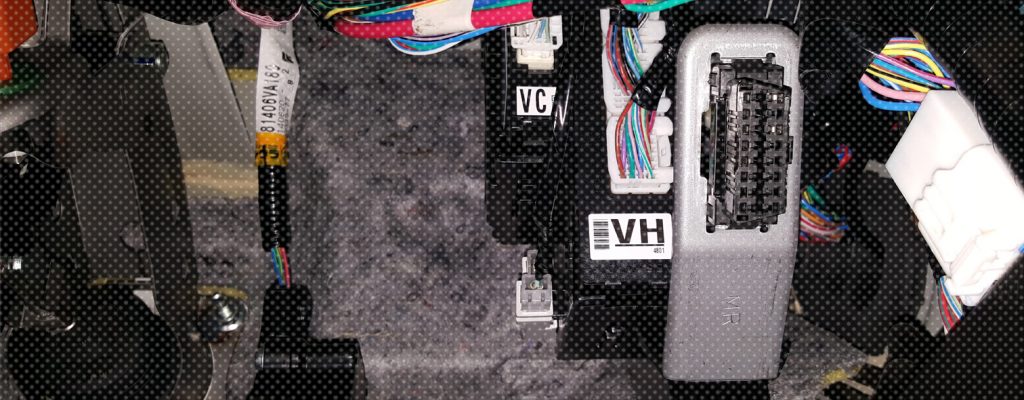
TMC | Test Mode Connector. Used to initiate reflash mode in many vehicles. |
TMSA | Test Mode Switch Assembly. Provides convenient access to Test Mode Connectors. |
Tune | A computer program that alters the tuning maps in a vehicle. Also called a ‘ROM’. |
Tune Bank | A collection of Tune Sets. |
Tune Set | A set of tunes which apply to a single vehicle type. |
Tuning Maps | Data tables that describe to the ECU the correct amount of a physical quantity (i.e., fuel, ignition timing, turbo boost pressure) to apply to a vehicle under a predefined set of conditions (e.g., engine speed, engine load, requested throttle / torque, ambient conditions, etc). |